

LST-RM1 Roofing Hot Air Welder
Application
It can be applicable for welding PVC-P、PE、TPO、ECB、CSPE、EPDM、PVDF and other
Coated fabric covering, foil and homogeneous or coating sealing film and PE coating fabric.
Precautions
Unplug the tools before opening it to avoid of being hurt by exposed wires or component inside the machine with power.
Incorrect use of it can cause fire and explosion hazard because of high temperature, especially near combustible materials and explosive gases.
Don’t touch heater tube and nozzle when they are hot. They may cause burns. Don’t point hot air flow in the direction of people or animals.

The voltage rating stated on the welder must correspond to line/mains voltage (120V). The drop cable / wire with protective earthed conductors can only be used.

To ensure operator safety and reliable operation of equipment, the power supply must be installed power supply and leakage protection at the construction site.

It must be running at the correct use of manipulation of the operator, or they may cause a fire or explosion caused by high temperature.

Don’t use welder in the water, or on a muddy construction site, to avoid flooding, rain or moisture.
Parameter
|
Model
|
LST-RM1 |
| Voltage | 230 V |
| Frequency | 50 Hz |
| Power | 3600 W |
| Temperature | 50 - 620 °C |
| Welding Speed | 1~10 m/min |
| Welding Width | 40 mm |
| Size( L*W*H) | 530 × 330 × 280 mm |
| Motor | Brushless |
| Weight | 20 Kg |
| Certificate | CE |
| Warranty | One Year |
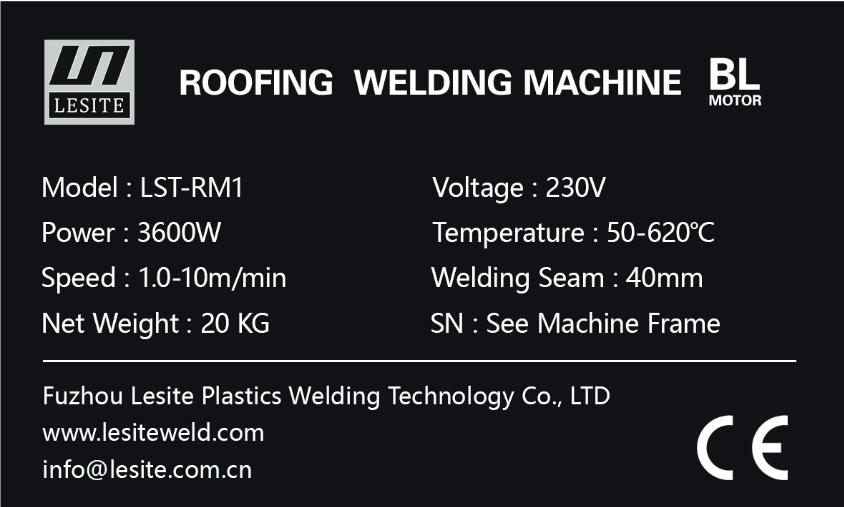
Nameplate
The model identification and serial number identification are marked onthe nameplate of the machine you choose.
Please provide these data when consulting Lesite Sales and Service Center.
Main Parts

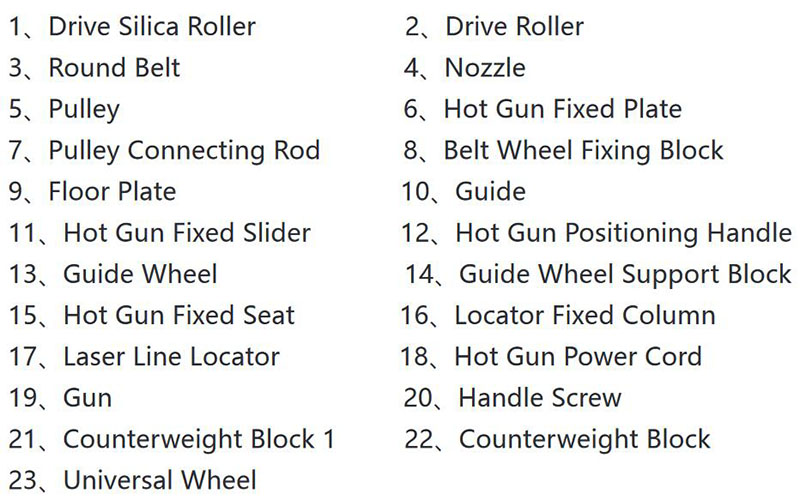
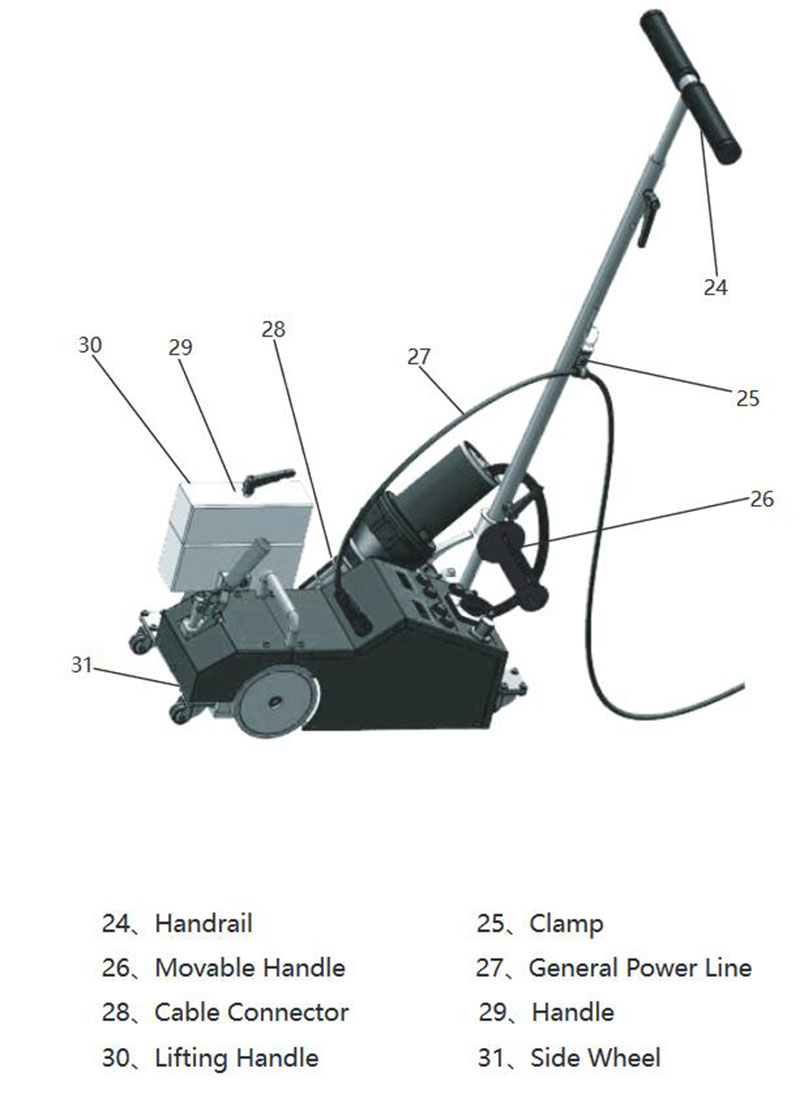
Controller Panel
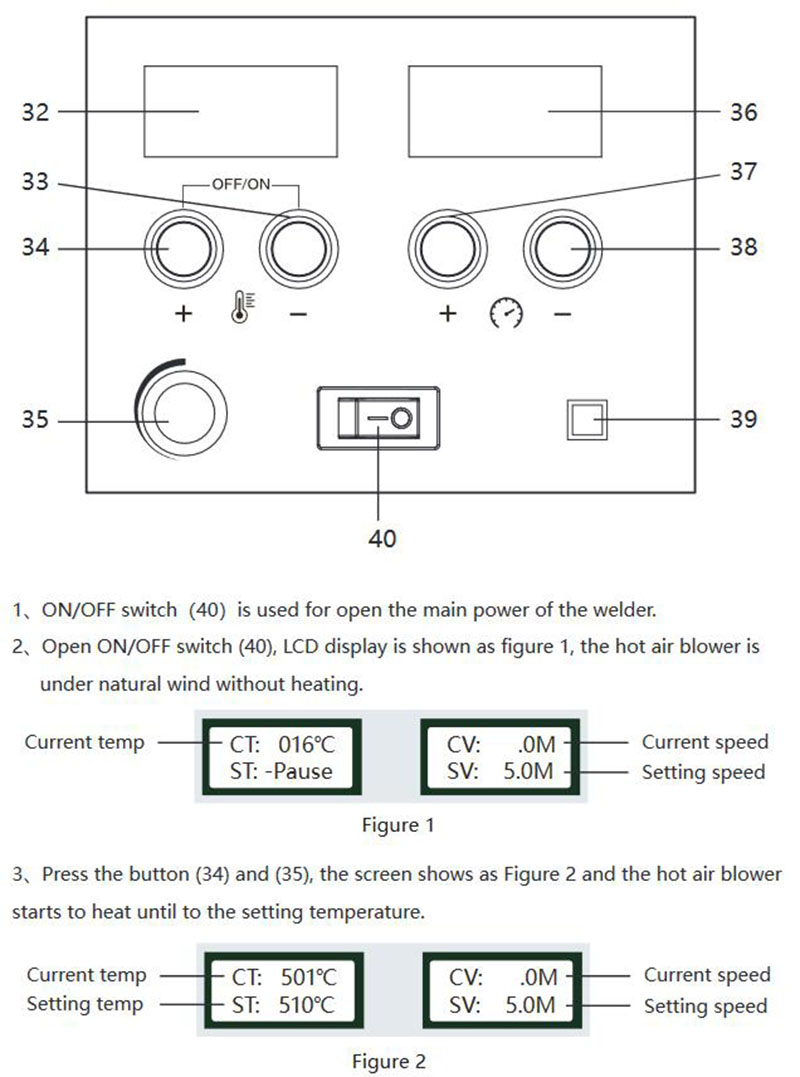
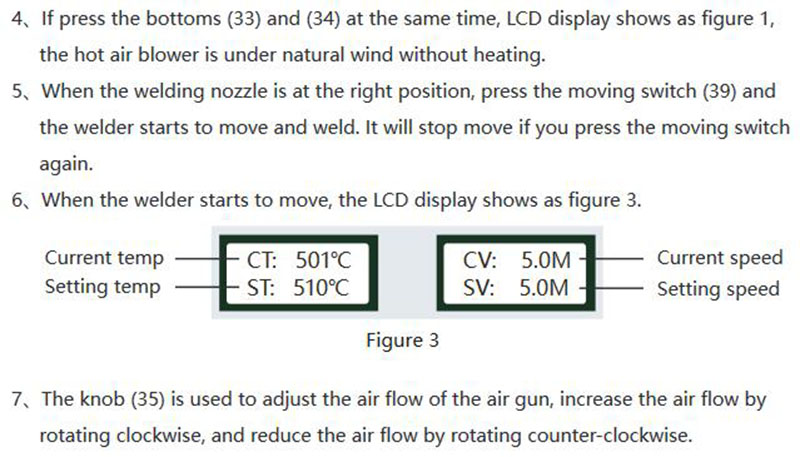
Welding Parameters Setting
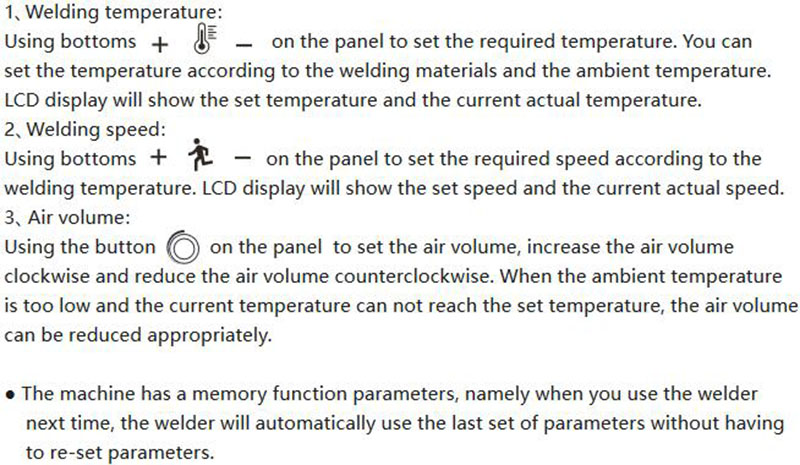
Welding Steps
1、Setting welding parameters (see above).
2、When the temperature reaches the set value.
3、Welding machine positioning.
4、Pull up the positioning handle (12) of the air gun, lift the air gun (19), lower the air nozzle (4) and make it close to the submerged membrane. Move the air gun to the left to insert the air nozzle into the overlap membrane and make the air nozzle in place. At this time, the welding machine will walk automatically for welding.
5、Always pay attention to the position of the guide wheel (13) and adjust it by touching the handle (24) lightly if it deviates from the position.
6、 Pull up the positioning handle (12) of the air gun after welding, move the air nozzle to the right until it stops, and rotate upward until it is locked.
7、After welding, press the button on the control panel at the same time (33) and (34) and make the air gun in the state of blowing cold air to cool the air nozzle.
8、 Turn off the power supply with the power switch.
Positioning The Welder
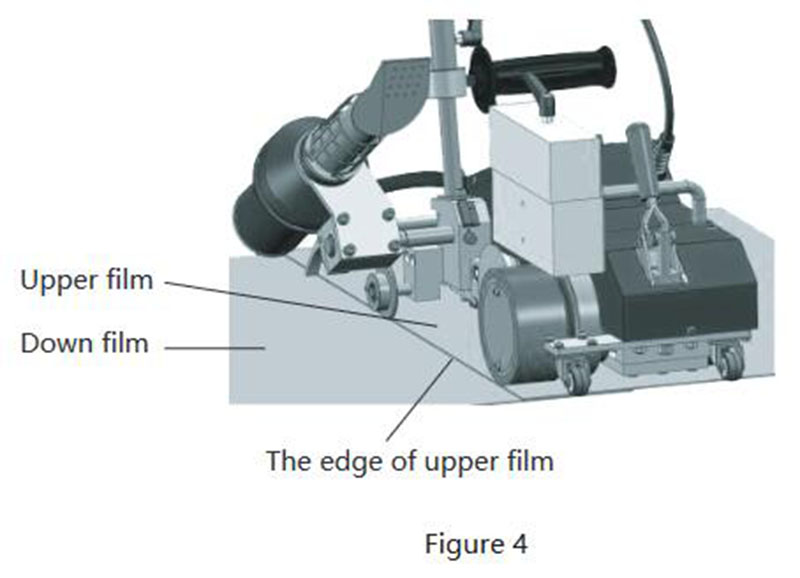
Pressure Lift lever (30) to lift machine, move it to welding position (the edge of upper membrane should keep in the same alignment with Drive silica roller (1) and the edge of Guide wheel (13), as shown in figure 4.
Instructions For Use

In order to prevent the machine from being damaged during transportation, the machine is fixed in the steel packing box with screws. When using the machine for the first time, it is necessary to loosen three machine fixing screws and take them out to remove the machine from the packing box, as shown in the figure above.
Using Condition
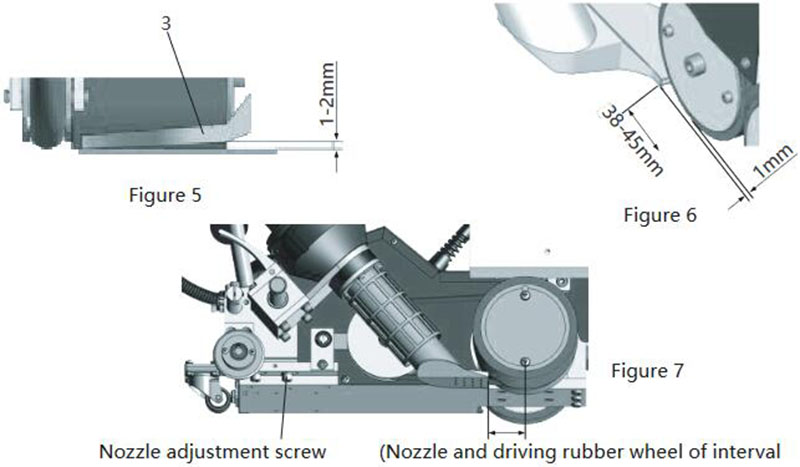
1、The distance between hot air nozzle and ground should be shown as figure 5(We have adjusted the distance).
2、 The distance between hot air nozzle and Drive roller should be shown as figure 6(We have adjusted the distance). You can adjust Hot air nozzle adjusting screw figure 7 if the distance is not right.
Quality Assurance
· This product guarantees a 12-month shelf life from the day it is sold to consumers. We will be responsible for failures caused by material or manufacturing defects. We will repair or replace defective parts at our sole discretion to meet the warranty requirements.
· The quality assurance does not include damage to wearing parts (heating elements, carbon brushes, bearings, etc.), damage or defects caused by improper handling or maintenance, and damage caused by falling products. Irregular use and unauthorized modification should not be covered by the warranty.
Repairs and Spare Parts
· It is strongly recommended to send the product to Lesite company or authorized repair center for professional inspection and repair.
· Only original Lesite spare parts are allowed.

FUZHOU LESITE PLASTICS WELDING TECHNOLOGY CO.,LTD


